Replication Don Smith's Device No. 9

  • 3.6K Views
  • Last Post 3 weeks ago
ScientificVoyager posted this 10 February 2026

Hi everyone. 

For some time now, I have been interested in Don Smith's replica No. 9. There is not much information about this device, but I decided to make a small replica of it.

Any information about this device would be greatly appreciated.

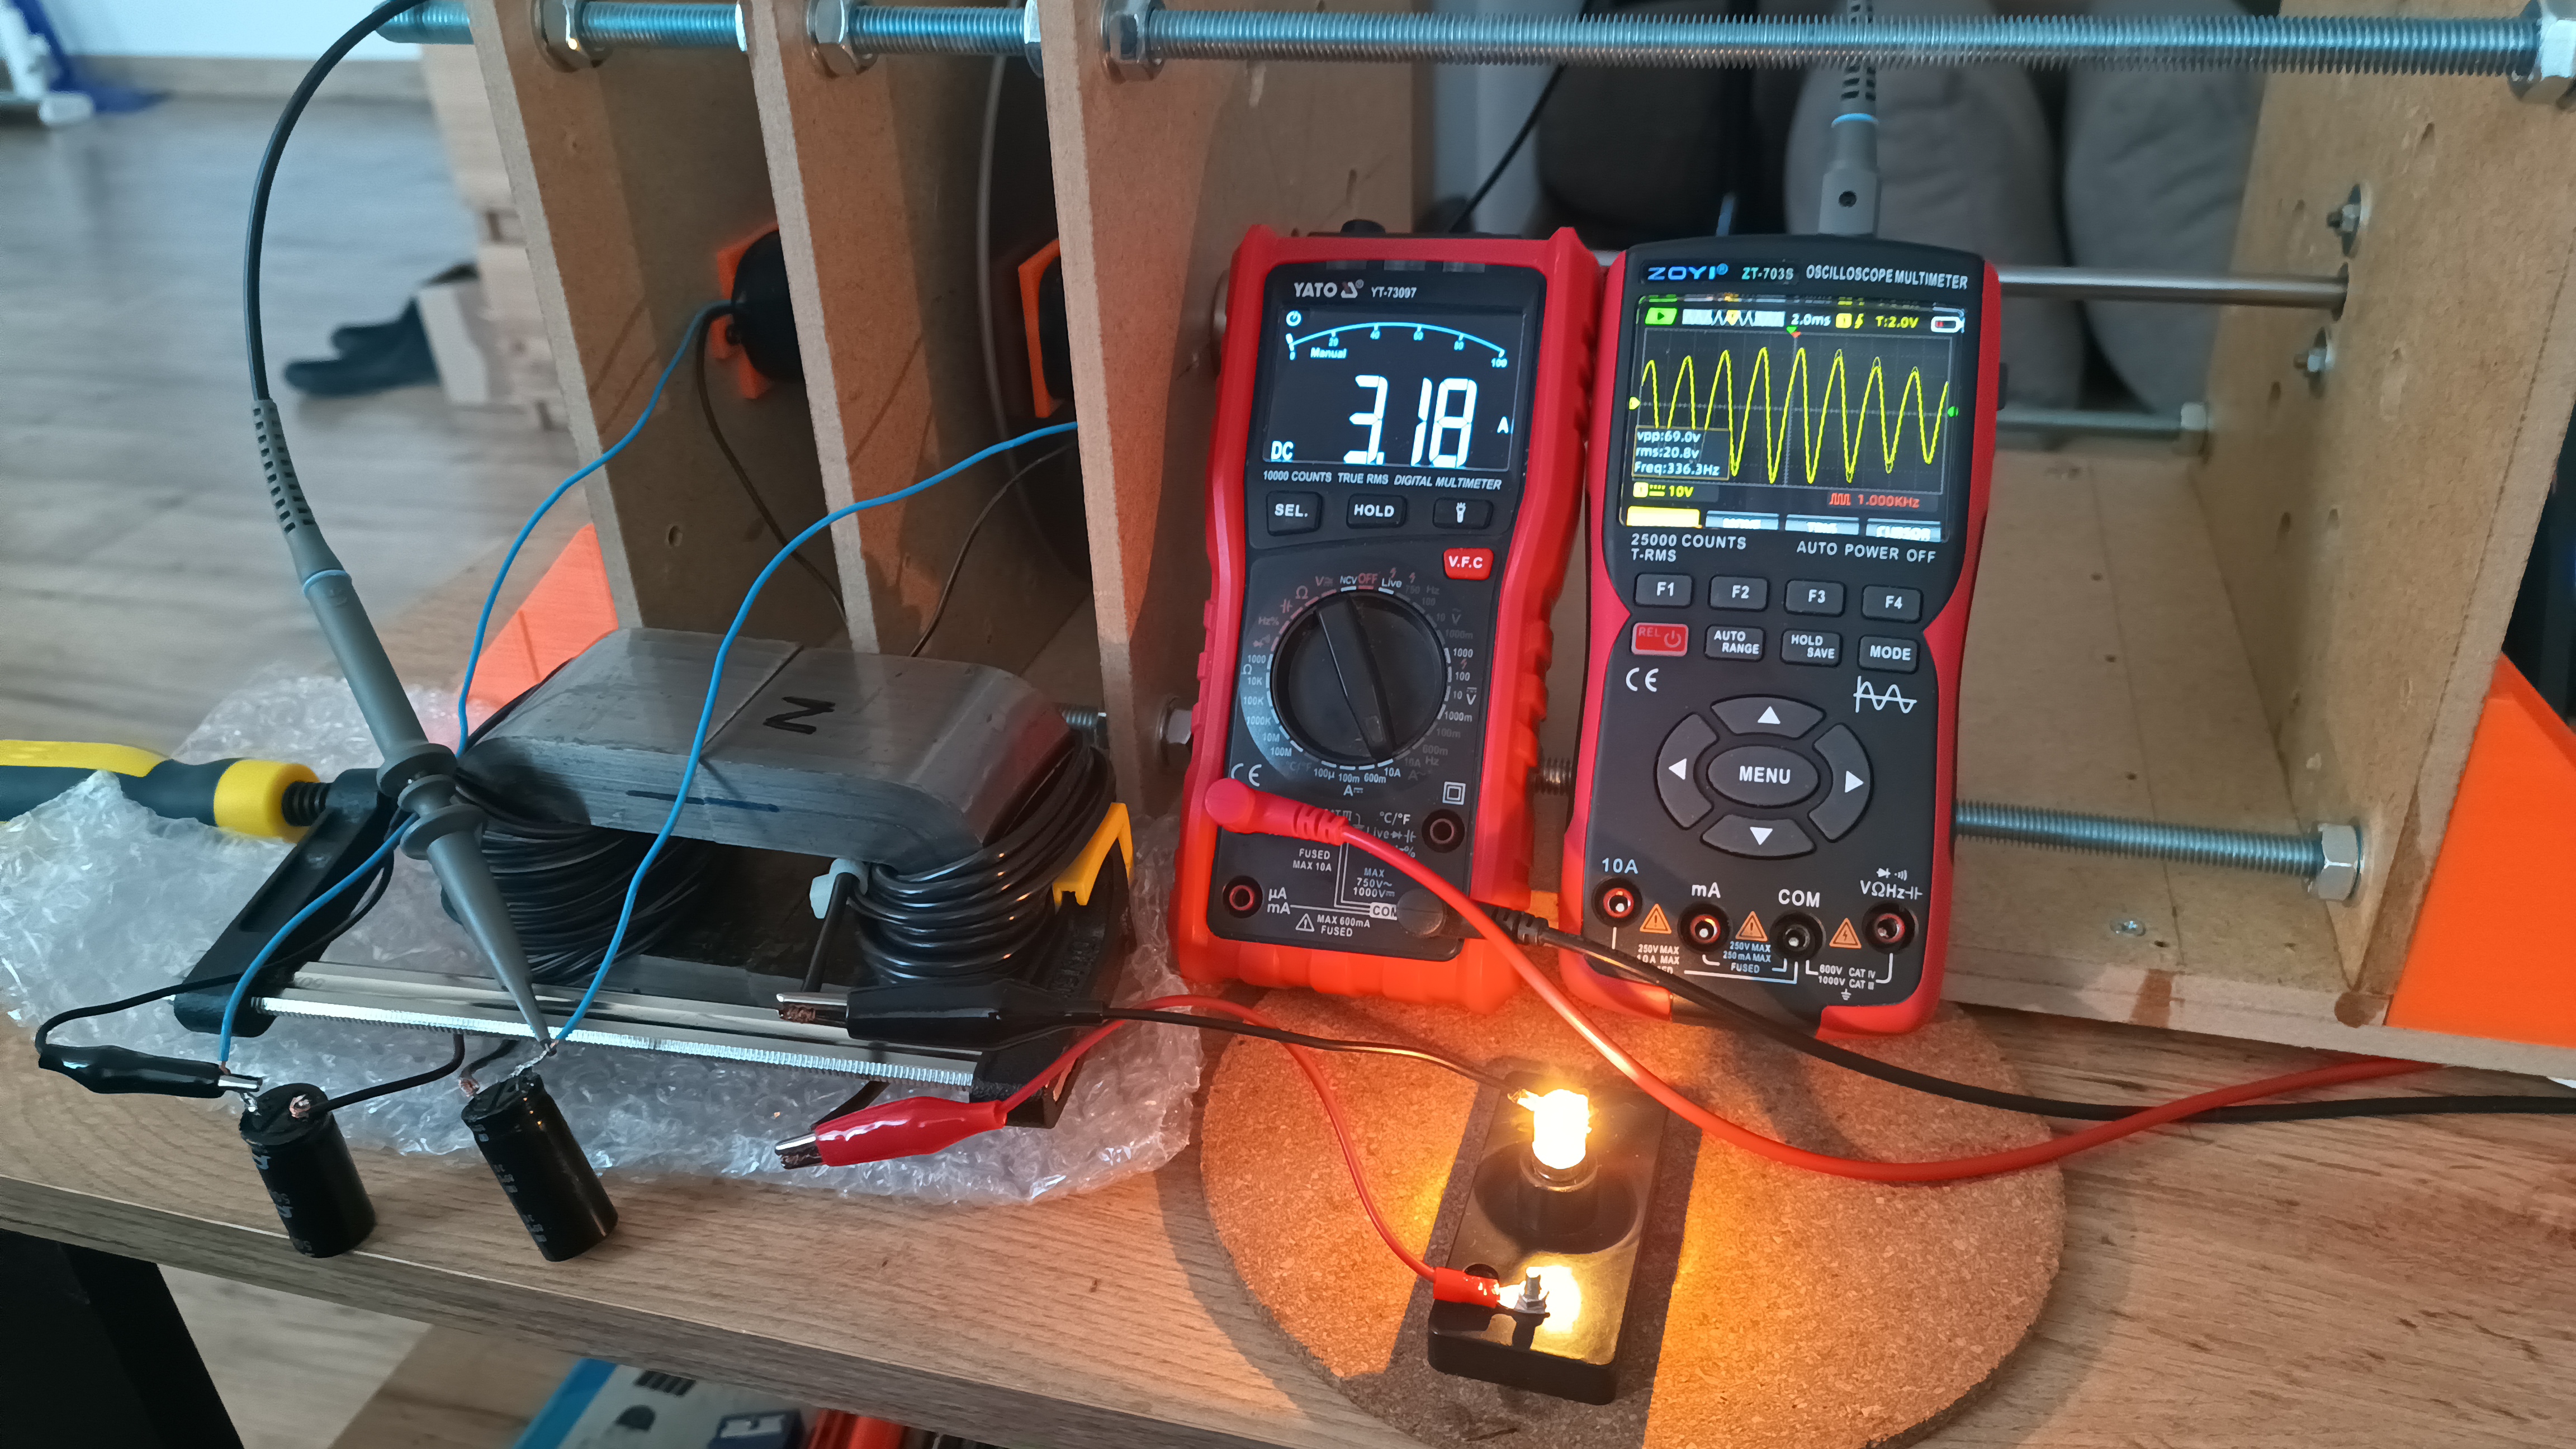
I have conducted some small tests and the results are really interesting because I managed to light a small bulb with two small coils, magnets and a steel disc with holes.

When powering the motor rotating the disc and connecting the load to the coils, the motor driving the steel disc did not feel any resistance while the bulb was lit, with no change in current consumption. That is why I found the effect very interesting and decided to do something more meaningful.

I am in the process of gathering materials and will share my observations with you from time to time.
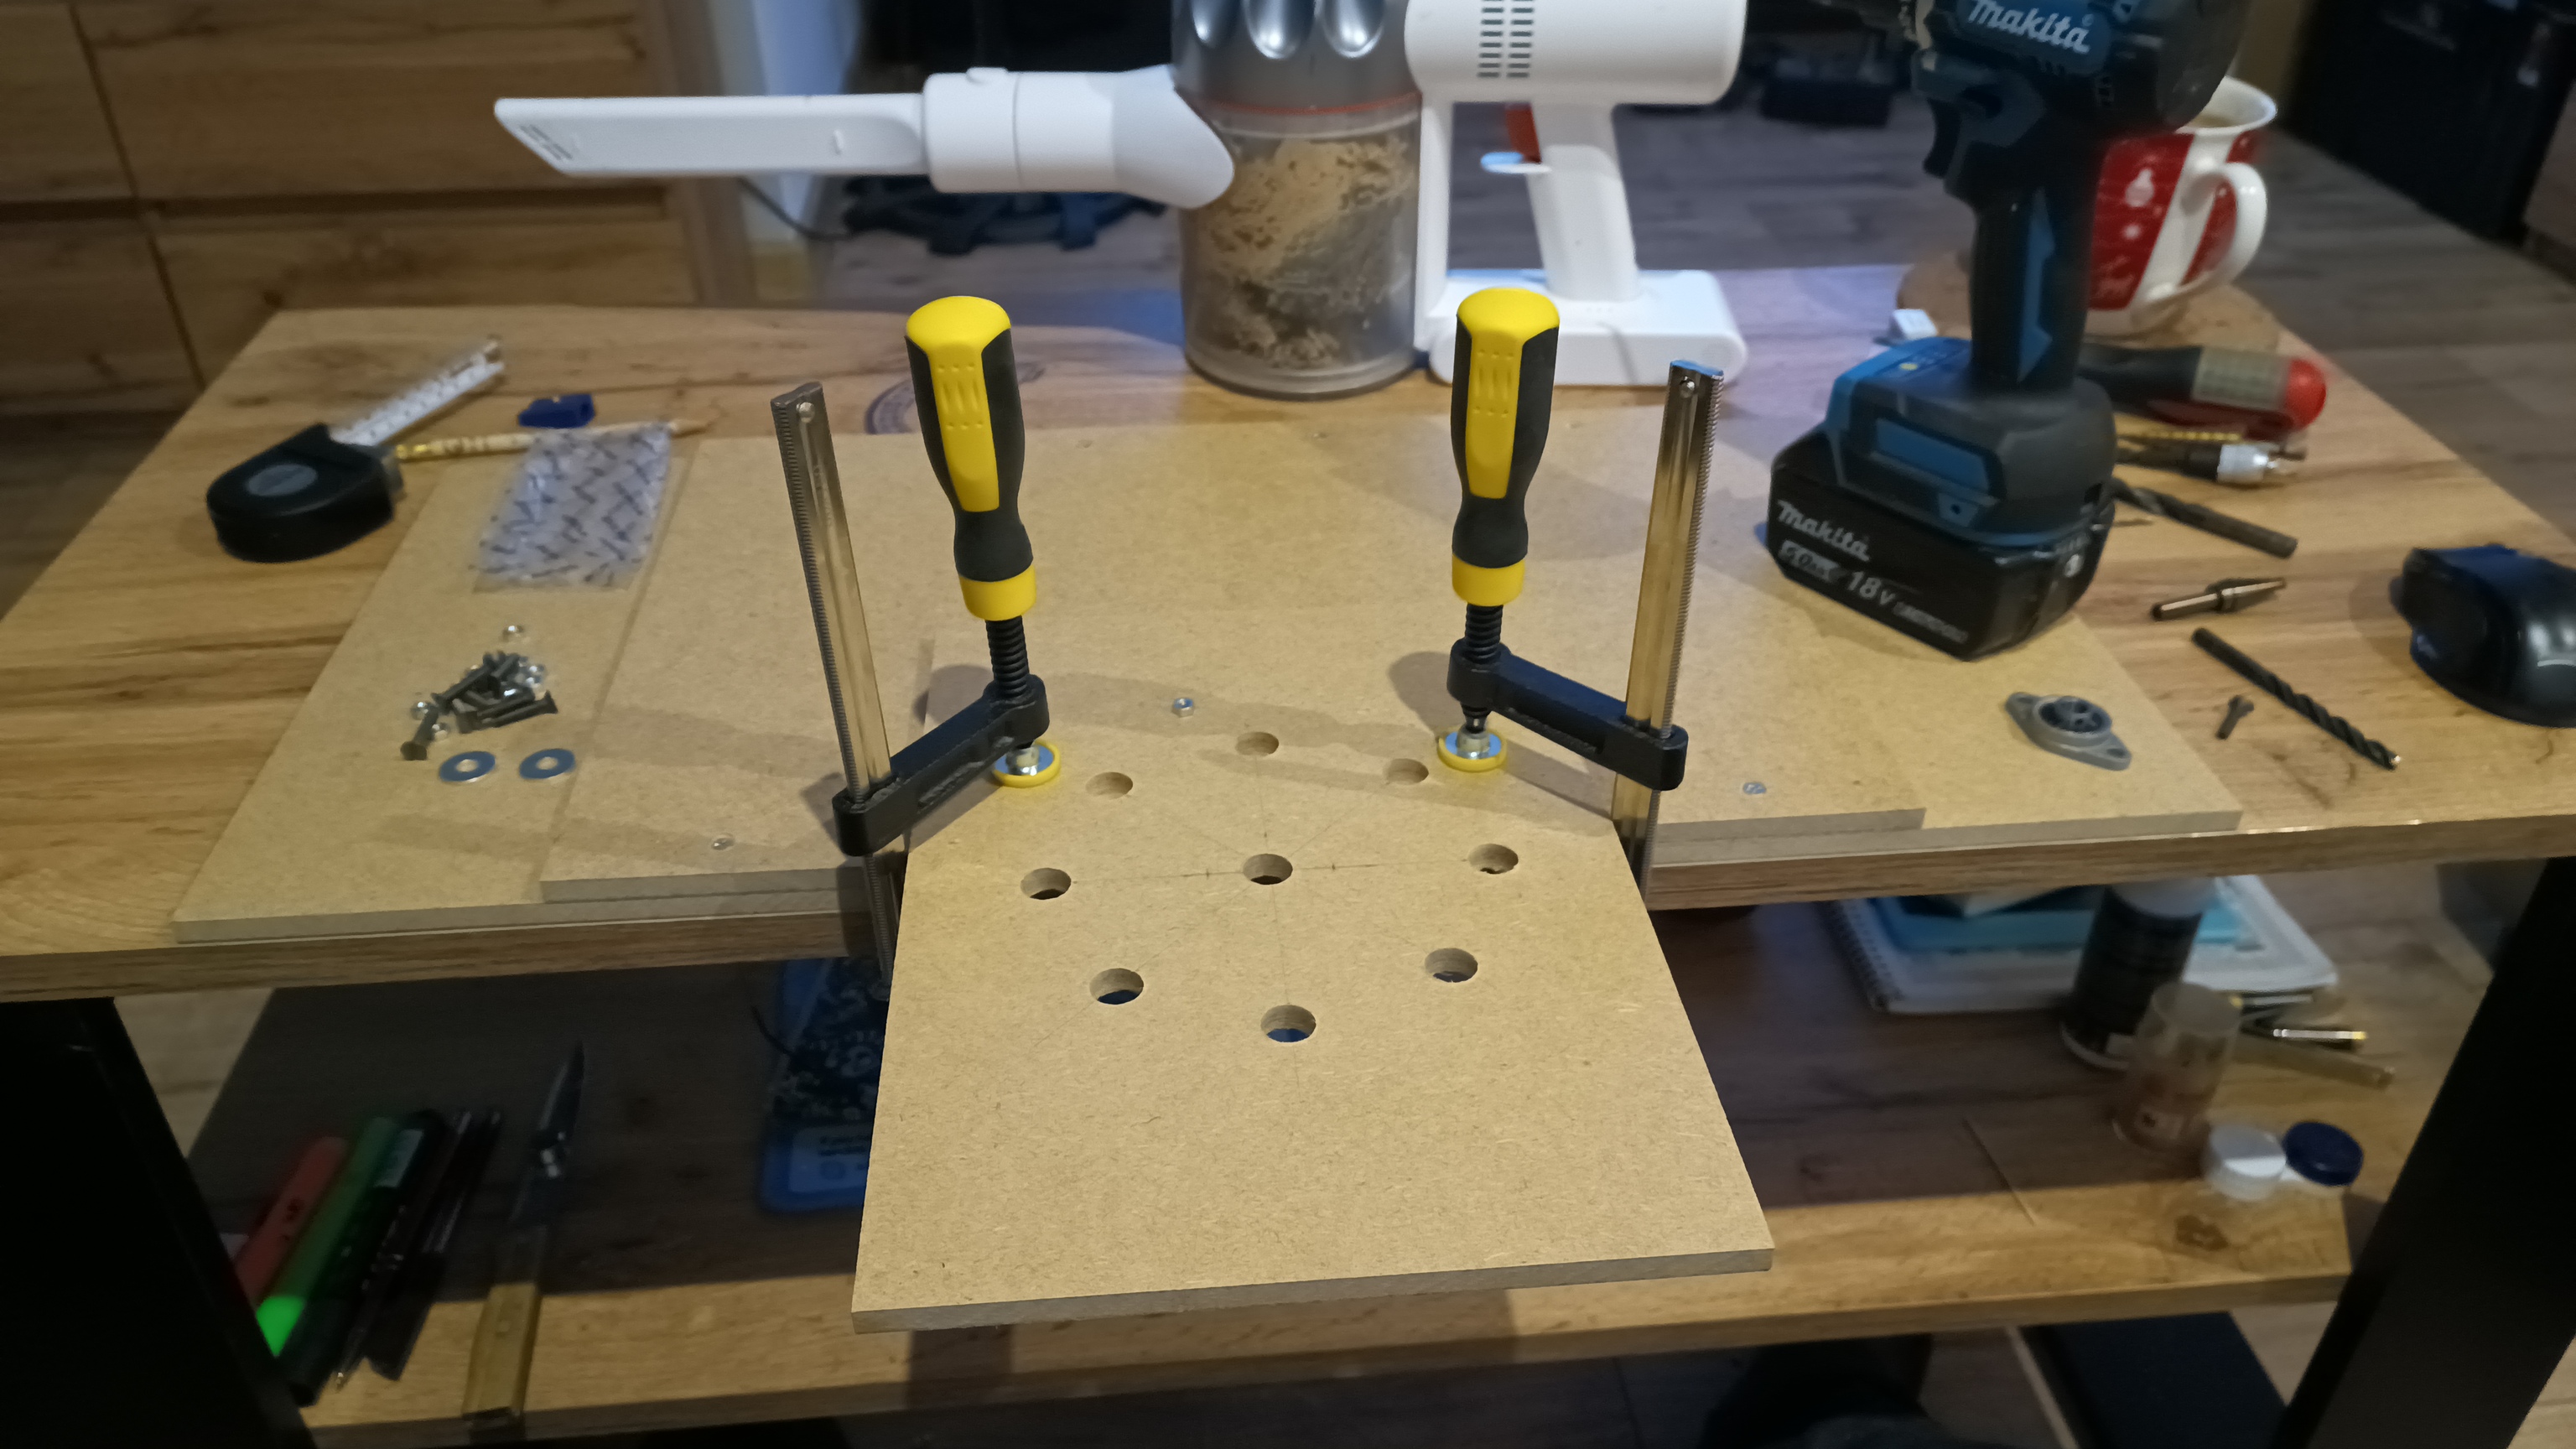
In general, I have made a wooden structure to put it all together. I commissioned a company that laser cuts such things to make metal discs. The first discs will be made of ordinary steel. I designed the coil spools in FreeCad and they are being printed. Now I am waiting for a delivery of silicon sheet metal to make the coil cores.

Has anyone attempted to investigate this effect?

The future belongs to those who can imagine it. N.Tesla

ScientificVoyager posted this 08 March 2026

Quoting:Jagau

Bearndorfer is right, and it works well that way.
Another circuit you can try is an open circuit connected with a single wire plugged into the center of the two red coils. That's where you'll get the most voltage with the diode connected to a single wire at that point.

Jagau

Jagau got me thinking, I'll check it out

What would happen if I tapped into my resonant circuit like this?

Would this also work with my resonant circuit around 295Hz?

The future belongs to those who can imagine it. N.Tesla

baerndorfer posted this 08 March 2026

depending on coils there are a few options that you can try. i suggest playing around with it. you can connect node-A directly into resonance system and use this 'signal' as input. node-B can go to a different 'mass' - earthground for example if your system is floating and not connected to ground. i play with this thing for a couple of years now and am still not able to give absolute recommendations. 

it works perfect when you have a reactive power situation and extract from it. if the load is in the lower voltage region, then i can extract more energy, than in the higher voltage regions. but this depends on input scenario (the higher voltage the better) and also on frequency (higher frequencies are 'better' than low frequencies).

i'm sure you will succeed

regards

B

Jagau posted this 09 March 2026

Quoting SV

What would happen if I connected to my resonant circuit in this way?

The best answer I can give you for now is that of the author do not disturb resonance with this way.

Quoting Pachuka about ferrite:

The ferrite acts as a magnetic flux concentrator, thus increasing the efficiency of energy transfer to the load. It is important that this transfer does not disrupt the system's resonance.

This is achieved via a loosely coupled circuit (ferrite), which has minimal impact on the main dynamics of the receiving circuit

Excessive load at ferrite output, will lead to a decrease in the quality factor and disruption of the system's operation.

Jagau

What we consider to be empty space is merely a manifestation of unawakened matter. N.T.

ScientificVoyager posted this 09 March 2026

I tested this connection.

The result is that capacitors C1 and C2 charge to their maximum voltage. At points N and P, I have approximately 190V. When I connect a 230V 25W bulb, it flashes and gradually dims, dropping to approximately 10 volts.I used capacitors C1 and C2 with a value of 10uf/250V.

The LC resonant circuit senses a short circuit and fails.

Quoting:Jagau

The best answer I can give you for now is that of the author do not disturb resonance with this way. 


Yes, I'm aware of that. Thanks.


Quoting:baerndorfer

i suggest playing around with it. you can connect node-A directly into resonance system and use this 'signal' as input. node-B can go to a different 'mass' - earthground for example if your system is floating and not connected to ground. 

I'll check this option. Thanks

I checked and unfortunately it doesn't work, there is no voltage at all.


---------------------------------------------------------------------------------------------------------


I ran this test and to my surprise I saw light at the end of the tunnel


I tested it with a metglass core and a regular ferrite core, and both worked. I only managed to extract 1/10 of the power from the LC resonant circuit of the generator, but I think it's now a matter of tuning the circuit so that all the energy is available on the secondary winding of the transformer.


PS.

DS always repeated in his lectures "I have always looked for simple solutions closer to nature".

----------------------------------------------------------------------------------------------------------------------------------

Now I intend to carry out this variant.


The transformer will have a 1:0.25 split because I want to reduce the RMS voltage from 60V to about 15V.
I'll use a parallel capacitor to tune the secondary winding to the main LC resonance frequency.
I'm wondering about the transformer's primary winding: what its inductance should be relative to the inductance of the generator coils.
I have the generator coils connected in series, and their total inductance is 31.99mH.
I need to think about this, what do you think? What would you do?

The future belongs to those who can imagine it. N.Tesla

ScientificVoyager posted this 13 March 2026

Hi everyone. I've done some testing to fine-tune the transformer's resonant circuit, but I haven't achieved satisfactory results. After a few attempts, I managed to squeeze 15 watts from the transformer output with an input consumption of 52 watts.

I received new metal clamps for the discs, and I designed new discs from low-carbon steel. It turns out that the old discs had holes the same diameter as the coil cores, and I think that's a mistake. Now the holes in the disc will expose the entire coil. The discs have already been ordered, so the wait is on . Tests will be repeated with new discs and at higher RPMs.

Have a nice day.

The future belongs to those who can imagine it. N.Tesla

Fernando posted this 13 March 2026

Hello ScientificVoyager , maybe your last test It is not the best for you but 15 W It is good for only two coils, BRAVO, I never see people pull out more then a few miliamps including myself, I have to confes each time  I see a new test video from you i have a lot of hope. Keep try It you will find the best result. I was planning to replicate again and looking from chat gpt the best disc desing to interrupt the magnets the faster and shorter possible, the answer It is mix for the moment.

Best for you and yours.

ScientificVoyager posted this 13 March 2026

Hi Fernando. Thanks for the words of support 
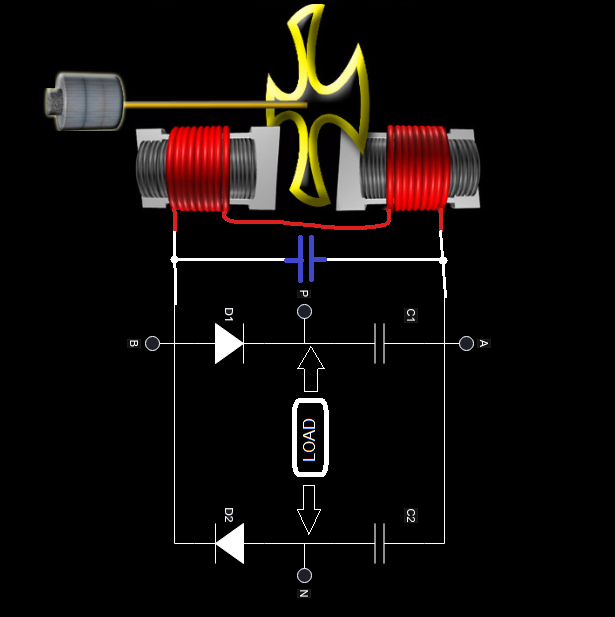
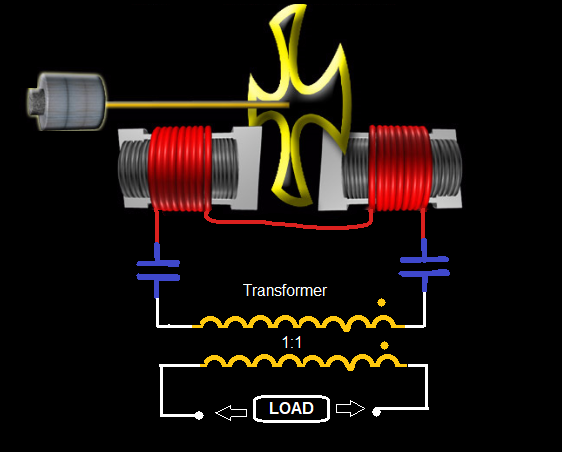
. I'm currently waiting for the new discs. I've thought about it and concluded that the coils need to be fully exposed, and the holes in the disc need to be slightly larger than the entire coil. If you need STL and DXF files, let me know, and I'll send them to you, spools for printing, and discs for laser cutting.

The old disk looked like this:

The new disks will be like this:

My discs are only 20 cm in diameter and I will need a bit higher revs, but that's not a problem.

I think that after this modification the coils will interact better with each other.

The minimum spacing between holes in the disc should be at least the width of the coil core, and the hole in the disc should be slightly larger than the diameter of the entire coil.

I forgot to add, my old discs were made of high-carbon hard steel, and now they will be made of low-carbon soft steel.

The future belongs to those who can imagine it. N.Tesla

Fernando posted this 23 March 2026

Hello ScientificVoyager, how are you? I've been giving your system a lot of thought, looking for potential improvements. Something occurred to me regarding the rotor position: did you align the center holes simultaneously? A possible improvement or test would be to advance one rotor. Specifically, when the center hole of one rotor aligns with coil number one (left), the second rotor's hole could be positioned approximately one-third of the way past coil number two (right), creating a phase shift. You could also test each coil separately, as you did with the capacitor, using an ultrafast diode in only one leg of the coil. The coils on the left and right should not be mixed in this way, as high-voltage peaks are collected by the capacitor in resonance, and a diode in the positive leg will not destroy it. As you mentioned before, if the gap between the rotors and coils is 5 to 7 mm, as in your video, you can lose 60 to 80% of flux. If you have the time, it might be worth considering. Thank you very much.

Best to you and yours.

.

ScientificVoyager posted this 23 March 2026

Quoting:Fernando

Hello ScientificVoyager, how are you? I've been giving your system a lot of thought, looking for potential improvements. Something occurred to me regarding the rotor position: did you align the center holes simultaneously? A possible improvement or test would be to advance one rotor. Specifically, when the center hole of one rotor aligns with coil number one (left), the second rotor's hole could be positioned approximately one-third of the way past coil number two (right), creating a phase shift. You could also test each coil separately, as you did with the capacitor, using an ultrafast diode in only one leg of the coil. The coils on the left and right should not be mixed in this way, as high-voltage peaks are collected by the capacitor in resonance, and a diode in the positive leg will not destroy it. As you mentioned before, if the gap between the rotors and coils is 5 to 7 mm, as in your video, you can lose 60 to 80% of flux. If you have the time, it might be worth considering. Thank you very much.

Best to you and yours.

.

Hi Fernando. You raise a very interesting point. I'm currently waiting for the new rotary discs; they should arrive this week. Overall, I haven't decided on the coil arrangement relative to the disc yet. I'll be repeating the tests from scratch with the new rotary discs. Before I place all the coils around the rotary disc, I first want to explore every possibility that will be most efficient. I plan to place three sections on the rotor axis, consisting of magnets, coils, and the rotary disc. Each section will be offset by a certain angle to reduce the cogging torque between the disc and the coil core.
I'm still thinking about this and have some thoughts. Testing will be coming soon.

Have a nice day/evening

The future belongs to those who can imagine it. N.Tesla

ScientificVoyager posted this 3 weeks ago

Dear friends.

After Easter, I’ll be starting some new tests. I’ve already got some new discs and calipers for them. The project is constantly evolving, and I’ll be testing some new coils too.

It’s going to be fun

Have a nice day/night

The future belongs to those who can imagine it. N.Tesla

Close